


Of all the critical parts of a boat, few are more important – or more overlooked – than the humble bilge pump.
Not only does it get rid of the small quantities of water that get inside the hull from unexpected waves and the like, but it also serves as an essential warning device that your boat has a significant issue. After all, a constantly running bilge pump is often a boater’s first indication that the boat has a considerable leak, or that it’s been launched without installing the drain plug. Even so, most of us just take it for granted that it’s going to work as expected year in, year out.
The fact of the matter is that virtually everything has a finite lifespan, especially electrical components that are repeatedly exposed to water, but you can easily extend the life of your bilge pump with just a quick bit of annual maintenance.
In this Mercury Quick Tip video, we’ll show you how to do it, and all you’ll need is a flathead screwdriver, wet/dry vacuum, white vinegar, scrub brush, small scissors and a tiny bit of grease.
Here are the steps:
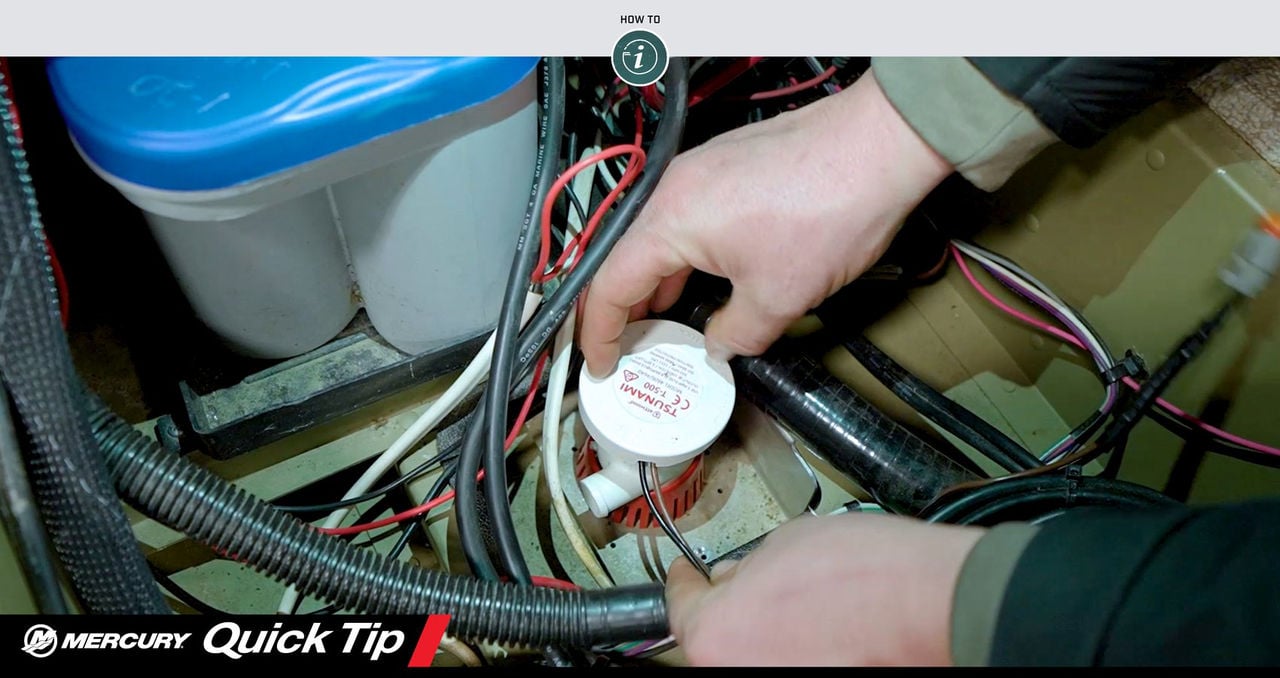
- Open the access panel that’s closest to your bilge pump. If you’re not sure where that is consult your boat’s owner’s manual, but it’s typically near the centerline of the vessel, far aft. The bilge pump itself is about the size of your fist (in small-to-medium boats), and it will have a couple of insulated wires and a discharge hose attached to it. It’s usually positioned close to the lowest point of the hull, within a foot or two of the drain plug.
Note: In a sterndrive boat, the bilge pump may be located directly under the engine, which makes access a little harder, but it still should be reachable from the side of the engine.
- Remove any visible debris from the bilge area by hand. Be sure to look and clean as far forward as you can as any leaves, grass, etc., that are under the deck will eventually end up near the bilge pump.
- Confirm that the bilge pump activation switch is turned off. The bilge pump should be connected to the boat’s wiring harness via a plastic connector. Find it and disconnect it.
- With your screwdriver, loosen the clamp that is keeping the discharge hose connected to the pump. Work the hose loose from the pump and put the clamp somewhere it won’t get lost or dropped into the bilge.
- Grasp the top of the pump and carefully twist it counterclockwise. It should come free of its strainer base with just a quarter turn or so. The base will be attached to the hull, so it will stay in place.
- Take the portion of the pump you just removed and twist the top counterclockwise until the top comes out of the lower housing. Clean out the inside of both pieces until they are completely free of debris. If the pump has sucked up any fishing line, you may need to use your scissors to cut it up so you can pull it out one piece at a time.
- Thoroughly inspect the pump’s impeller: if it’s cracked or broken in any way, the bilge pump will need to be replaced.
- With your wet/dry vac, vacuum out the bilge area, including in and around the strainer base of the bilge pump.
- Away from the boat, rinse the inside of the bilge pump (top and bottom) with vinegar to remove any mold, mildew or sediment that may have accumulated there. A scrub brush – or even an old toothbrush – can help clean the crevices. Then rinse the pump with clean water, taking care to keep the wires and connector dry.
- Apply a thin coat of grease to the O-ring seal inside the pump. Then, put the two halves of the pump back together. They should lock together with a small clockwise twist.
- Put the pump back in its strainer base and lock it in with a clockwise quarter-turn. Make sure the pump is oriented as it was before; otherwise the discharge hose may be difficult or impossible to connect.
- Put the clamp over the discharge hose and reconnect the hose to the pump. Tighten down the hose clamp good and snug, but not so tight that it crushes the outlet connection of the pump. Give the pump and bilge area a good visual inspection to confirm that everything is in order, then reconnect the pump’s wire connector to the boat’s wiring harness.
- Replace any hatches or access panels you might have removed, and the job is done.
It’s also a good practice to test the operation of the pump while the boat is on the trailer. To do this, put the drain plug in and put a few gallons of water in the bilge via an access panel (taking care to not unnecessarily pour water directly on any under-deck electrical components). If equipped with an automatic float switch, the pump should activate on its own and pump the water overboard. In any case, you’ll want to test the manual switch as well. Once the water stops flowing, turn the switch off immediately as it’s not good for the pump to run dry.
It’s almost impossible for the pump to be in the absolute lowest point of the vessel, so it’s normal for the bilge to have a small bit of water in it even after running the bilge pump. If either a concerning amount of water remains, the pump won't turn off or the flow from the pump is weaker that you think it should be, take your boat to your local Mercury authorized dealer to have it inspected before putting your boat back on the water.