

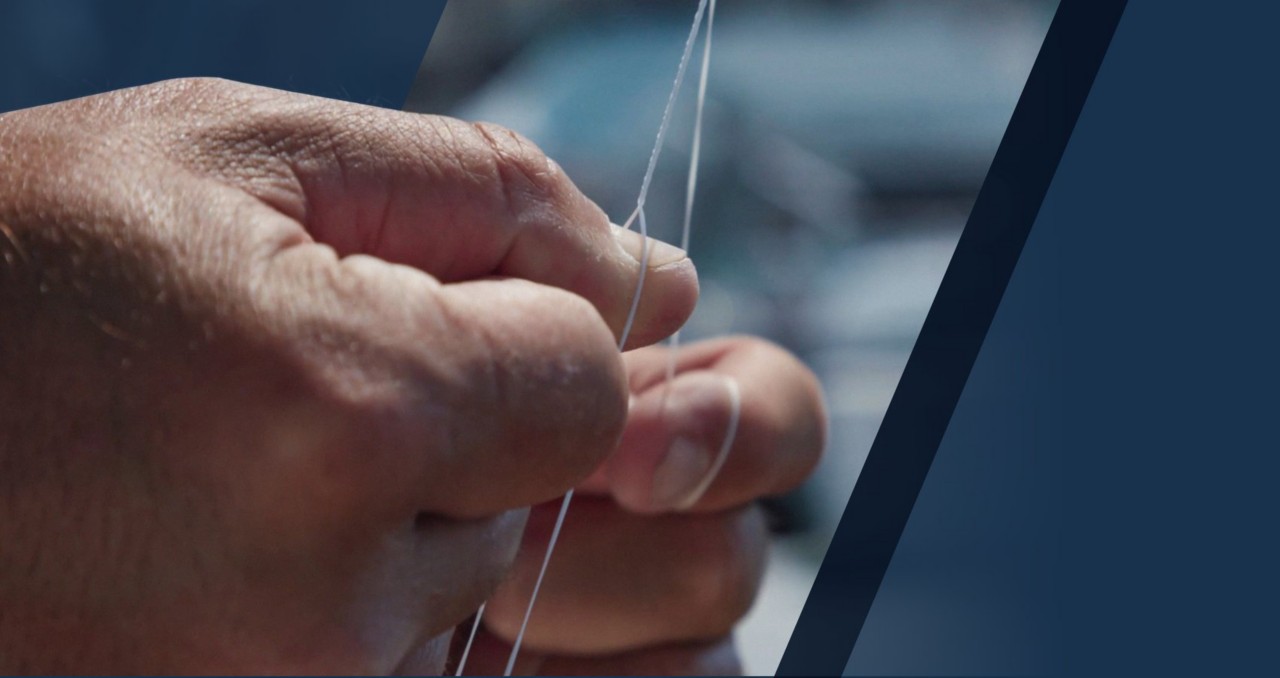
Named for the sportfishing hotspot in the Bahamas, the Bimini twist is incredibly useful because it doubles the tensile strength of the line by virtue of creating two parallel sections of line, while losing little to no line strength in the knot itself. When you see a seasoned saltwater angler quickly tie the Bimini twist, it looks like pure sorcery, and it can be hard to pick up each of the necessary steps. Compounding the difficulty of learning this knot is that there are almost as many discrete ways to tie it – each with its own nuance and rationale – as there are anglers who use it.
Fortunately for those of us who want to add the Bimini twist to our fishing arsenal, Capt. Ali Hussainy of the show “Local Knowledge” has identified what he believes is the fastest and easiest way to tie it, and he’s sharing it with us in this easy-to-follow video. Hussainy, a Mercury Pro Team member from San Diego, California, grew up fishing the waters off the Southern California coast before making a career in the tech industry. Now he shares his passion and knowledge of fishing and all things outdoors via his Discovery Channel TV show as well as BD Outdoors, the online magazine he co-founded.
The procedure for tying the Bimini twist is much easier to follow in the video, but here are the basic steps:
- With your rod secure in a rod holder, take about 4 feet of line and double it over to create a long parallel loop.
- Hold the tag end of the line secure to the standing line with your left hand while holding the loop outstretched with your right hand. While keeping the loop taut between your hands, roll your right hand over and over, twisting the loop 12 to 15 times.
- Note: You can reverse this “right-handed” setup, of course, but for the purposes of this instructional, we’re following Hussainy’s hand arrangement and movements.Put the end of the loop over the end of your reel handle, taking care to keep pressure on the tag end of the line with your left hand. Carefully wind the reel to apply enough tension to the line that the rod starts to bend a bit.
- Note: You can reverse this “right-handed” setup, of course, but for the purposes of this instructional, we’re following Hussainy’s hand arrangement and movements.Put the end of the loop over the end of your reel handle, taking care to keep pressure on the tag end of the line with your left hand. Carefully wind the reel to apply enough tension to the line that the rod starts to bend a bit.
- While holding the tag end tight in your left hand, insert your thumb into the open part of the loop near the reel handle. Then use your thumbnail to slowly push the twists up toward your left hand. The twists will get very tight, and then the tag line will start to get pulled into the knot, adding a second layer of wrapping over the top of your original twists. (Pulling down slightly on the tag end helps to get the wraps started and helps keep them tight and clean.)
- Your tag end will now be right at the upper end of the loop. Determine which side of the loop is the standing line, then tie a simple hitch around it with the tag end and pull it tight. Tie another hitch around the other strand of the loop and pull it tight also.
- Remember, keeping tension on the standing line as well as the tag line throughout the process is essential to tying a good Bimini twist, so once you have made the initial twists, make sure you keep everything taut until the knot is complete.
- Remember, keeping tension on the standing line as well as the tag line throughout the process is essential to tying a good Bimini twist, so once you have made the initial twists, make sure you keep everything taut until the knot is complete.
- Finally, finish off the knot by tying a double hitch around both strands at the same time. Pull it tight and trim the end, and your Bimini twist is complete.