

When you spend a lot of time on the water, your boat cover sees a lot of action, coming off and on a whole lot. It’s also subjected to normal wear around corners and sharp edges. And with all of that activity, it can be pretty darned easy to tear or wear a hole in your cover. It happens to the best of us! But getting a hole in your boat cover isn’t the end of the world, and it doesn’t necessarily mean you have to replace it. That’s because most holes are repairable, and that can save you a lot of money.
With a few supplies and a little effort, you can create a durable patch that can help you get a whole (no pun intended) lot more use out of your cover, keeping your boat safe, dry and protected.
Here’s what you’ll need:
- Painter’s tape
- Utility knife
- Tape measure
- Scissors
- Marker
- Matching tarp material
- Cardboard
- Paper
- Adhesive spray
To patch your boat cover, follow these simple steps. You can also watch the video below to see how it’s done.
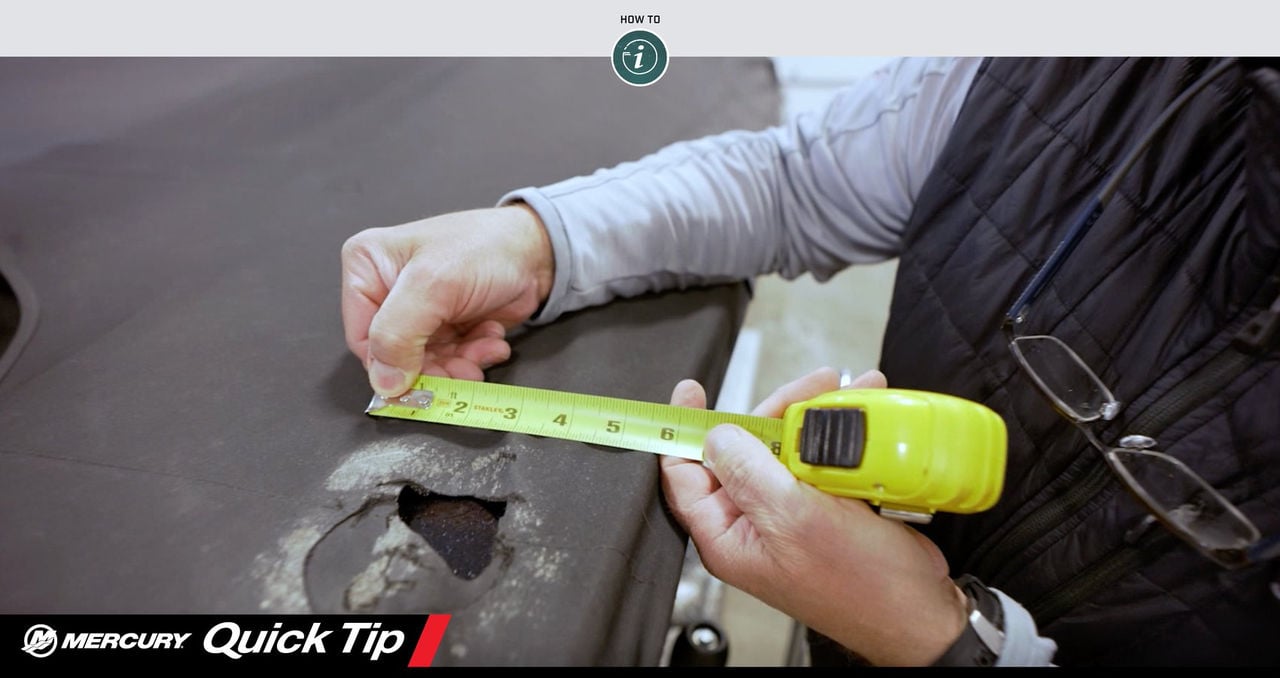
- Get started by measuring the size of the hole to be patched. Add one to two inches to the measurements to ensure adequate coverage.
- Next, cut two patches the size of your adjusted measurements.
- Then, create a paper template based on the size of your patch. Newspaper works great. If you don’t have a newspaper handy, you can also use regular printer paper. Place your patch on top of the paper, and trace around the outside of your patch with a marker.
- Put a piece of cardboard underneath the paper, and using a utility knife, cut along the outline to cut out the center.
- Next, use painter’s tape to secure the template to the area of your boat cover that needs patching, overlapping just enough for the tape to stick. Be sure to put cardboard underneath the area to be patched – this way you won’t get the adhesive anywhere you don’t want it.
- Mix the adhesive thoroughly by shaking the can for about a minute just prior to application.
- Then, spray the adhesive to the area of your boat cover that needs patching in short bursts, slightly overlapping each time.
- Change the direction in which you are spraying the adhesive, repeating the application process.
- Next, spray the adhesive on the backside of the patch the same way you did for the boat cover. Be sure you cover the patch thoroughly, including the edges.
- Wait 5-10 minutes for both surfaces to get tacky.
- Replace the piece of cardboard you have underneath the hole with a new piece of clean cardboard.
- Remove the template.
- Next, place the patch directly on your boat cover, matching it up with the adhesive that you just applied around the hole.
- Apply pressure over the entire patch to ensure a secure bond.
- After your patch is good and secure, flip your cover over to expose the backside of the hole and repeat the above process so that you have a patch covering the hole on both sides of your cover.
And that’s all there is to it. Your boat cover is ready to protect your boat again - after you return from a day on the water, of course!